Presentation Practice Station
This article has not been updated recently and may contain dated material.
Step 1 – Log in and Turn on Monitor
- Touch a key on the keyboard to wake the computer up.
- Type CONTROL/ATL/DELETE keys all at once to view login prompt.
- Log into computer with your PAWS ID and password.
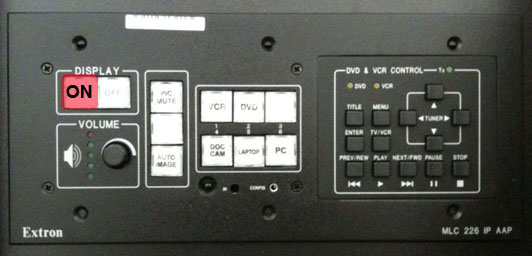
- Push ON button on podium control panel to turn on the large wall monitor behind the podium.
Step 2 – Set up your presentation
Open your presentation and any browsers if you are showing websites.
NOTE: If you are showing documents, make sure they are ready open on the computer and ready to show. You don’t want to be searching and opening documents once your presentation recording is started. Minimize these applications. Their icons will be at the bottom of the desktop when you need them for your presentation.
Step 3 – Open Pinnacle recording software
Find the Pinnacle icon on the desktop and double-click.

Pinnacle has 3 tab views:
If you are not already in the capture view, click the Capture tab at the top of the screen.

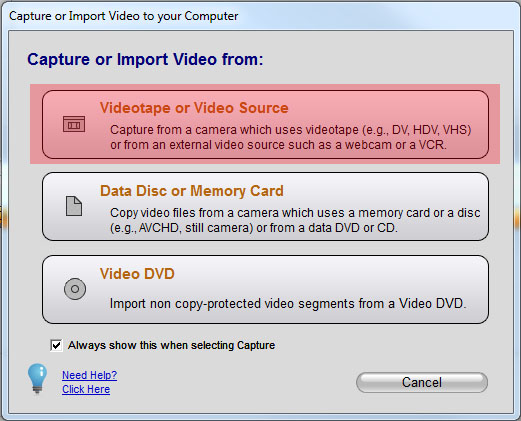
If a pop-up window shows up for selecting video sources, click on the first button, Videotape or Video Source.
Step 4 – Adjust Camera
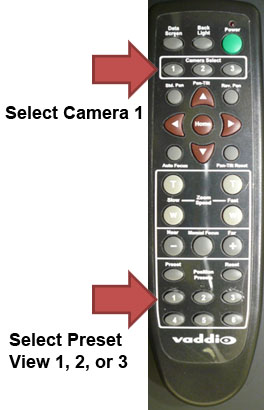
- If the camera is already on, you should see yourself in the video preview window. If the preview window is black, turn the camera on using the green POWER button on the camera remote.
- Select preset view (1, 2, or 3):
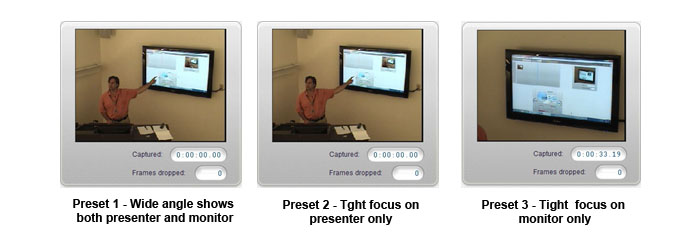
1 – Wide angle shows both presenter and monitor
2 – tight focus on presenter only
3 – tight focus on monitor only
- You can adjust this view any time during your presentation. If camera does not respond, click on select camera 1 button. WARNING: Do not click camera # 2 or 3 during your presentation!
|
 |
|
|
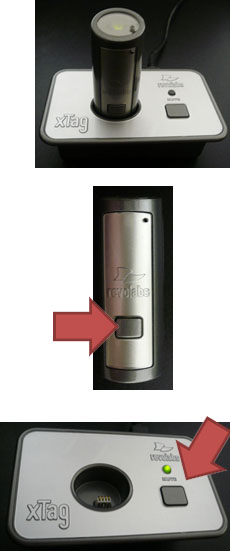
Step 5 – Turn on Microphone
- Take microphone out of cradle.
.
- Press mic button. You should see a green light. If the mike is in its cradle or muted (red light) your video will not have any sound recorded.
- You can clip the mike onto your shirt or rest it on the podium.
NOTE: You can mute sound if you want to during your presentation, by either pressing MUTE button on the cradle, or pressing the mike button. Remember to un-mute by pressing button again.
|
 |
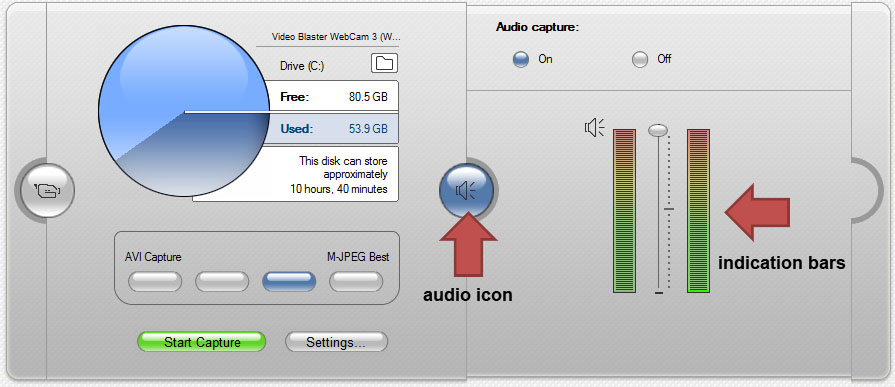
- You can check the audio input level by clicking on the audio icon and then speaking into the mike. Watch the 2 indication bars to see what is an optimal speaking volume.
NOTE: If someone in your audience asks a question, the mike may not pick up their voices well. Either hand them the mike before they speak or restate their question after.
|
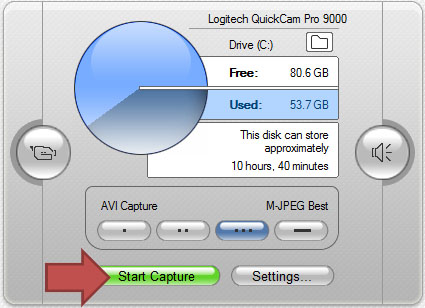
Step 6 – Start Recording
- Click the Start Capture button.
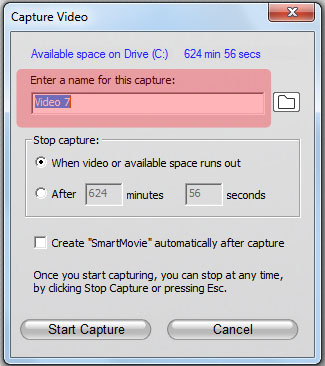
- A window will appear that asks you to name your video clip. This is not necessary at this step. Click continue to start recording.
- Wait a few seconds before beginning your presentation. You will see the small movie icon appear on the left, and the timecode start in the video preview window.
- Launch your presentation and start presenting.
NOTE: If you wish to be able see the recording screen while you give the presentation, you can bring and launch your presentation on your laptop.
|
|
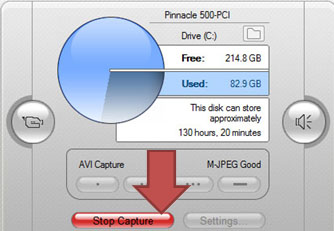
Step 7 – Stop Recording
- When your presentation is finished, close or minimize your presentation window.
- Click on the Pinnacle icon at the bottom of the desktop to reopen the Pinnacle window.
- Click on the Stop Recording button.
|
 |
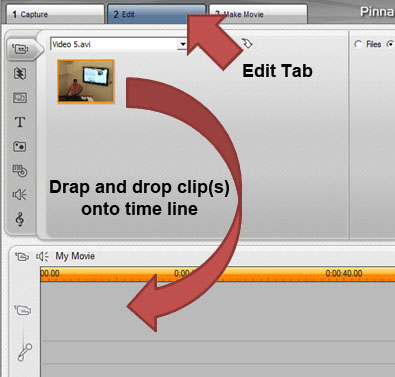
Step 8 – Editing
- Click and drag the clip on to the time line below. If there are multiple clips, drag them one by one and put them in proper order.
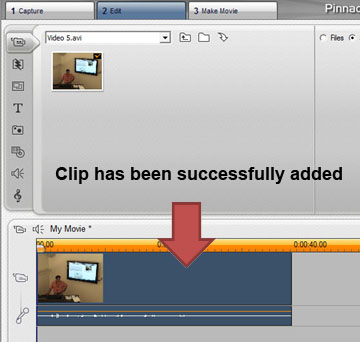
- You will see a snap shot on the time line showing you successfully added the clip.
|
|
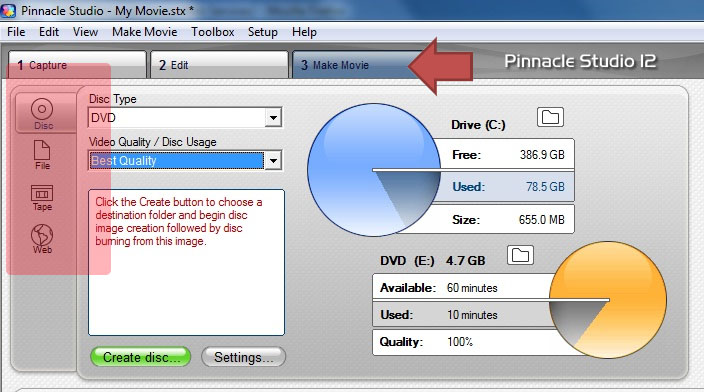
Step 9 – Making your movie
- Click the Make Movie tab.
- Choose file type:
AVI -- big file raw video
Flash movie -- mp3 -- small file
MP4 -- very small file
NOTE: The format type will be determined by your purpose for the video, and how you intend to save it. The smaller the file size, the less quality video you will have. If the purpose is to show detail and facial expressions, you may want the larger file size. If it is only do document your presentation and hear the audio, then a small file size will be ok.
|
| |
|
- If you are placing it on a flash drive, you may need to make it as small as possible. If you are burning it onto a DVD, then a large file might be fine. Ask your instructor which one they prefer.
- Click the Create File button.
You will be asked to name the file. It will be saved in your User folder on the podium computer. Saved movie files will only be visible to you when you log in. Other users logging into this machine will NOT see your movie files. At some time to be determined, all files will be purged from these computers. Make sure you have a copy saved on a flash drive or a DVD.
|
|
| |
|
15058
1/29/2024 9:20:22 AM